Install the app
How to install the app on iOS
Follow along with the video below to see how to install our site as a web app on your home screen.
Nota: This feature may not be available in some browsers.
Je gebruikt een verouderde webbrowser. Het kan mogelijk deze of andere websites niet correct weergeven.
Het is raadzaam om je webbrowser te upgraden of een alternatieve webbrowser te gebruiken.
Het is raadzaam om je webbrowser te upgraden of een alternatieve webbrowser te gebruiken.
Bouwverslag SK450
- Topicstarter nander
- Startdatum
hallo,
dan ga ik dan maar even proberen, gebruiks aanwijzing even opgezocht :
http://www.quadkopters.com/wp-content/uploads/2014/02/HK-KK-2.1-manual.pdf
STEP-1 Mount the FC on the frame with the LCD facing front
and the buttons facing back.
GEDAAN
STEP-2 Connect the receiver outputs to the corresponding
left-hand side of the controller board.
GEDAAN
STEP-3 Connect the ESC’s to the right side of the Flight Controller Board. M1 is towards
the front of the board and M8 is nearest to the push buttons. The negative (black or brown) lead
towards the edge of the FC. The negative (black or brown) lead is connected to the edge of the
Flight Controller.
GEDAAN
STEP-4 Set up a new model on your transmitter and use a normal airplane profile and
bind the Receiver to the Transmitter
GEDAAN
STEP-5 Turn on the power and press the ‘Menu’ button, then using
the ‘Up’ and ‘Down’ buttons highlight ‘Receiver Test sub-menu and
press Enter. Now move each channel on your transmitter and check
that the displayed direction corresponds with the stick movements on
the Flight Controller, if any are reversed, then go to your Transmitter
and reverse that channel. Check that the AUX channel is showing "ON"
when you activate the AUX Switch on your transmitter, if not, reverse
the AUX channel on your transmitter.
Use the trim or sub-trim controls on your transmitter to adjust the
channel values shown on the LCD to zero.
GEDAAN
STEP-6 Scroll down to and enter the "Load Motor Layout" sub-menu
and choose the configuration you want. If the configuration you want is
not listed, use the "Mixer Editor" sub-menu to make one. See later for
more on that.
STEP-7 Enter the "Show Motor Layout" sub-menu and confirm the
following. Is the configuration correct? Are the motors and servos
connected the correct output? Correct rotation direction? Does the
motor speed up when dropping the arm it is mounted on?
STEP-8 Enter the “Receiver test" and check for nominal values on
each channel, move your Transmitter sticks around to ensure they are
all working, including AUX1.
STEP-9 Enter the "Mode Settings" and check and adjust:
"Self-Level": Determines how the self-levelling function will be
controlled, either by STICK or an AUX Channel.
"STICK MODE": Self-levelling is turned on by holding the aileron to the
right when arming or disarming. Turn it off with left aileron.
"AUX": Self-levelling is turned on/off by the AUX Channel.
"Auto Disarm": If set to YES then Flight Control board will
automatically disarm itself after 10-mins of inactivity.
"CPPM Enabled": Determine if the Flight Control Board is to use CPPM
data input.
STEP-10 Enter the "Stick Scaling" option, where you can
adjust the response from the stick to your liking. Higher number gives
higher response and lower numbers the converse. This is similar to
the endpoint or volume adjustment on your transmitter, where you
can adjust your transmitter to adjust the stick response and use the
stick scaling if you want more or less response from stick inputs.
als ik deze stappen volg moet het allemaal in orde komen ?
Laatst bewerkt:
STEP-1 Mount the FC on the frame with the LCD facing front
and the buttons facing back.
GEDAAN
STEP-2 Connect the receiver outputs to the corresponding
left-hand side of the controller board.
GEDAAN
STEP-3 Connect the ESC’s to the right side of the Flight Controller Board. M1 is towards
the front of the board and M8 is nearest to the push buttons. The negative (black or brown) lead
towards the edge of the FC. The negative (black or brown) lead is connected to the edge of the
Flight Controller.
GEDAAN
STEP-4 Set up a new model on your transmitter and use a normal airplane profile and
bind the Receiver to the Transmitter
GEDAAN
STEP-5 Turn on the power and press the ‘Menu’ button, then using
the ‘Up’ and ‘Down’ buttons highlight ‘Receiver Test sub-menu and
press Enter. Now move each channel on your transmitter and check
that the displayed direction corresponds with the stick movements on
the Flight Controller, if any are reversed, then go to your Transmitter
and reverse that channel. Check that the AUX channel is showing "ON"
when you activate the AUX Switch on your transmitter, if not, reverse
the AUX channel on your transmitter.
Use the trim or sub-trim controls on your transmitter to adjust the
channel values shown on the LCD to zero.
GEDAAN
STEP-6 Scroll down to and enter the "Load Motor Layout" sub-menu
and choose the configuration you want. If the configuration you want is
not listed, use the "Mixer Editor" sub-menu to make one. See later for
more on that.
GEDAAN
STEP-7 Enter the "Show Motor Layout" sub-menu and confirm the
following. Is the configuration correct? Are the motors and servos
connected the correct output? Correct rotation direction? Does the
motor speed up when dropping the arm it is mounted on?
GEDAAN
STEP-8 Enter the “Receiver test" and check for nominal values on
each channel, move your Transmitter sticks around to ensure they are
all working, including AUX1.
GEDAAN
STEP-9 Enter the "Mode Settings" and check and adjust:
"Self-Level": Determines how the self-levelling function will be
controlled, either by STICK or an AUX Channel.
"STICK MODE": Self-levelling is turned on by holding the aileron to the
right when arming or disarming. Turn it off with left aileron.
"AUX": Self-levelling is turned on/off by the AUX Channel.
"Auto Disarm": If set to YES then Flight Control board will
automatically disarm itself after 10-mins of inactivity.
"CPPM Enabled": Determine if the Flight Control Board is to use CPPM
data input.
GEDAAN
STEP-10 Enter the "Stick Scaling" option, where you can
adjust the response from the stick to your liking. Higher number gives
higher response and lower numbers the converse. This is similar to
the endpoint or volume adjustment on your transmitter, where you
can adjust your transmitter to adjust the stick response and use the
stick scaling if you want more or less response from stick inputs.
GEDAAN
BIJ STAP 6 heb ik hem in X mode gezet.
BIJ STAP 7 heb ik de motoren getest of ze de goeie richting op draaien, ze draaien allemaal de goeie richting op.
BIJ STAP 8 heb ik de receiver test gedaan om te kijken of alles het doet, doet het allemaal goed.
BIJ STAP 9 heb ik staan :self level : stick
link roll pitch : no
auto disarm : yes
cppm enabled : no
BIJ STAP 10 heb ik roll (ail) 30
pitch (ele) 30
yaw (rud) 50
trottle 79
en nog steeds het zelfde probleem......................
Laatst bewerkt door een moderator:
Wat doet link roll/pitch eigenlijk?
als je je pid instelling op je roll veranderd veranderen ze ook op je pitch, en andersom hetzelfde
")
hallo,
de link roll/pitch staan nu aan.
vlucht gemaakt")

[media=youtube]jZHvKERgW7E[/media]
[media=youtube]zWKLZ0ypDLY[/media]
eerste schade :
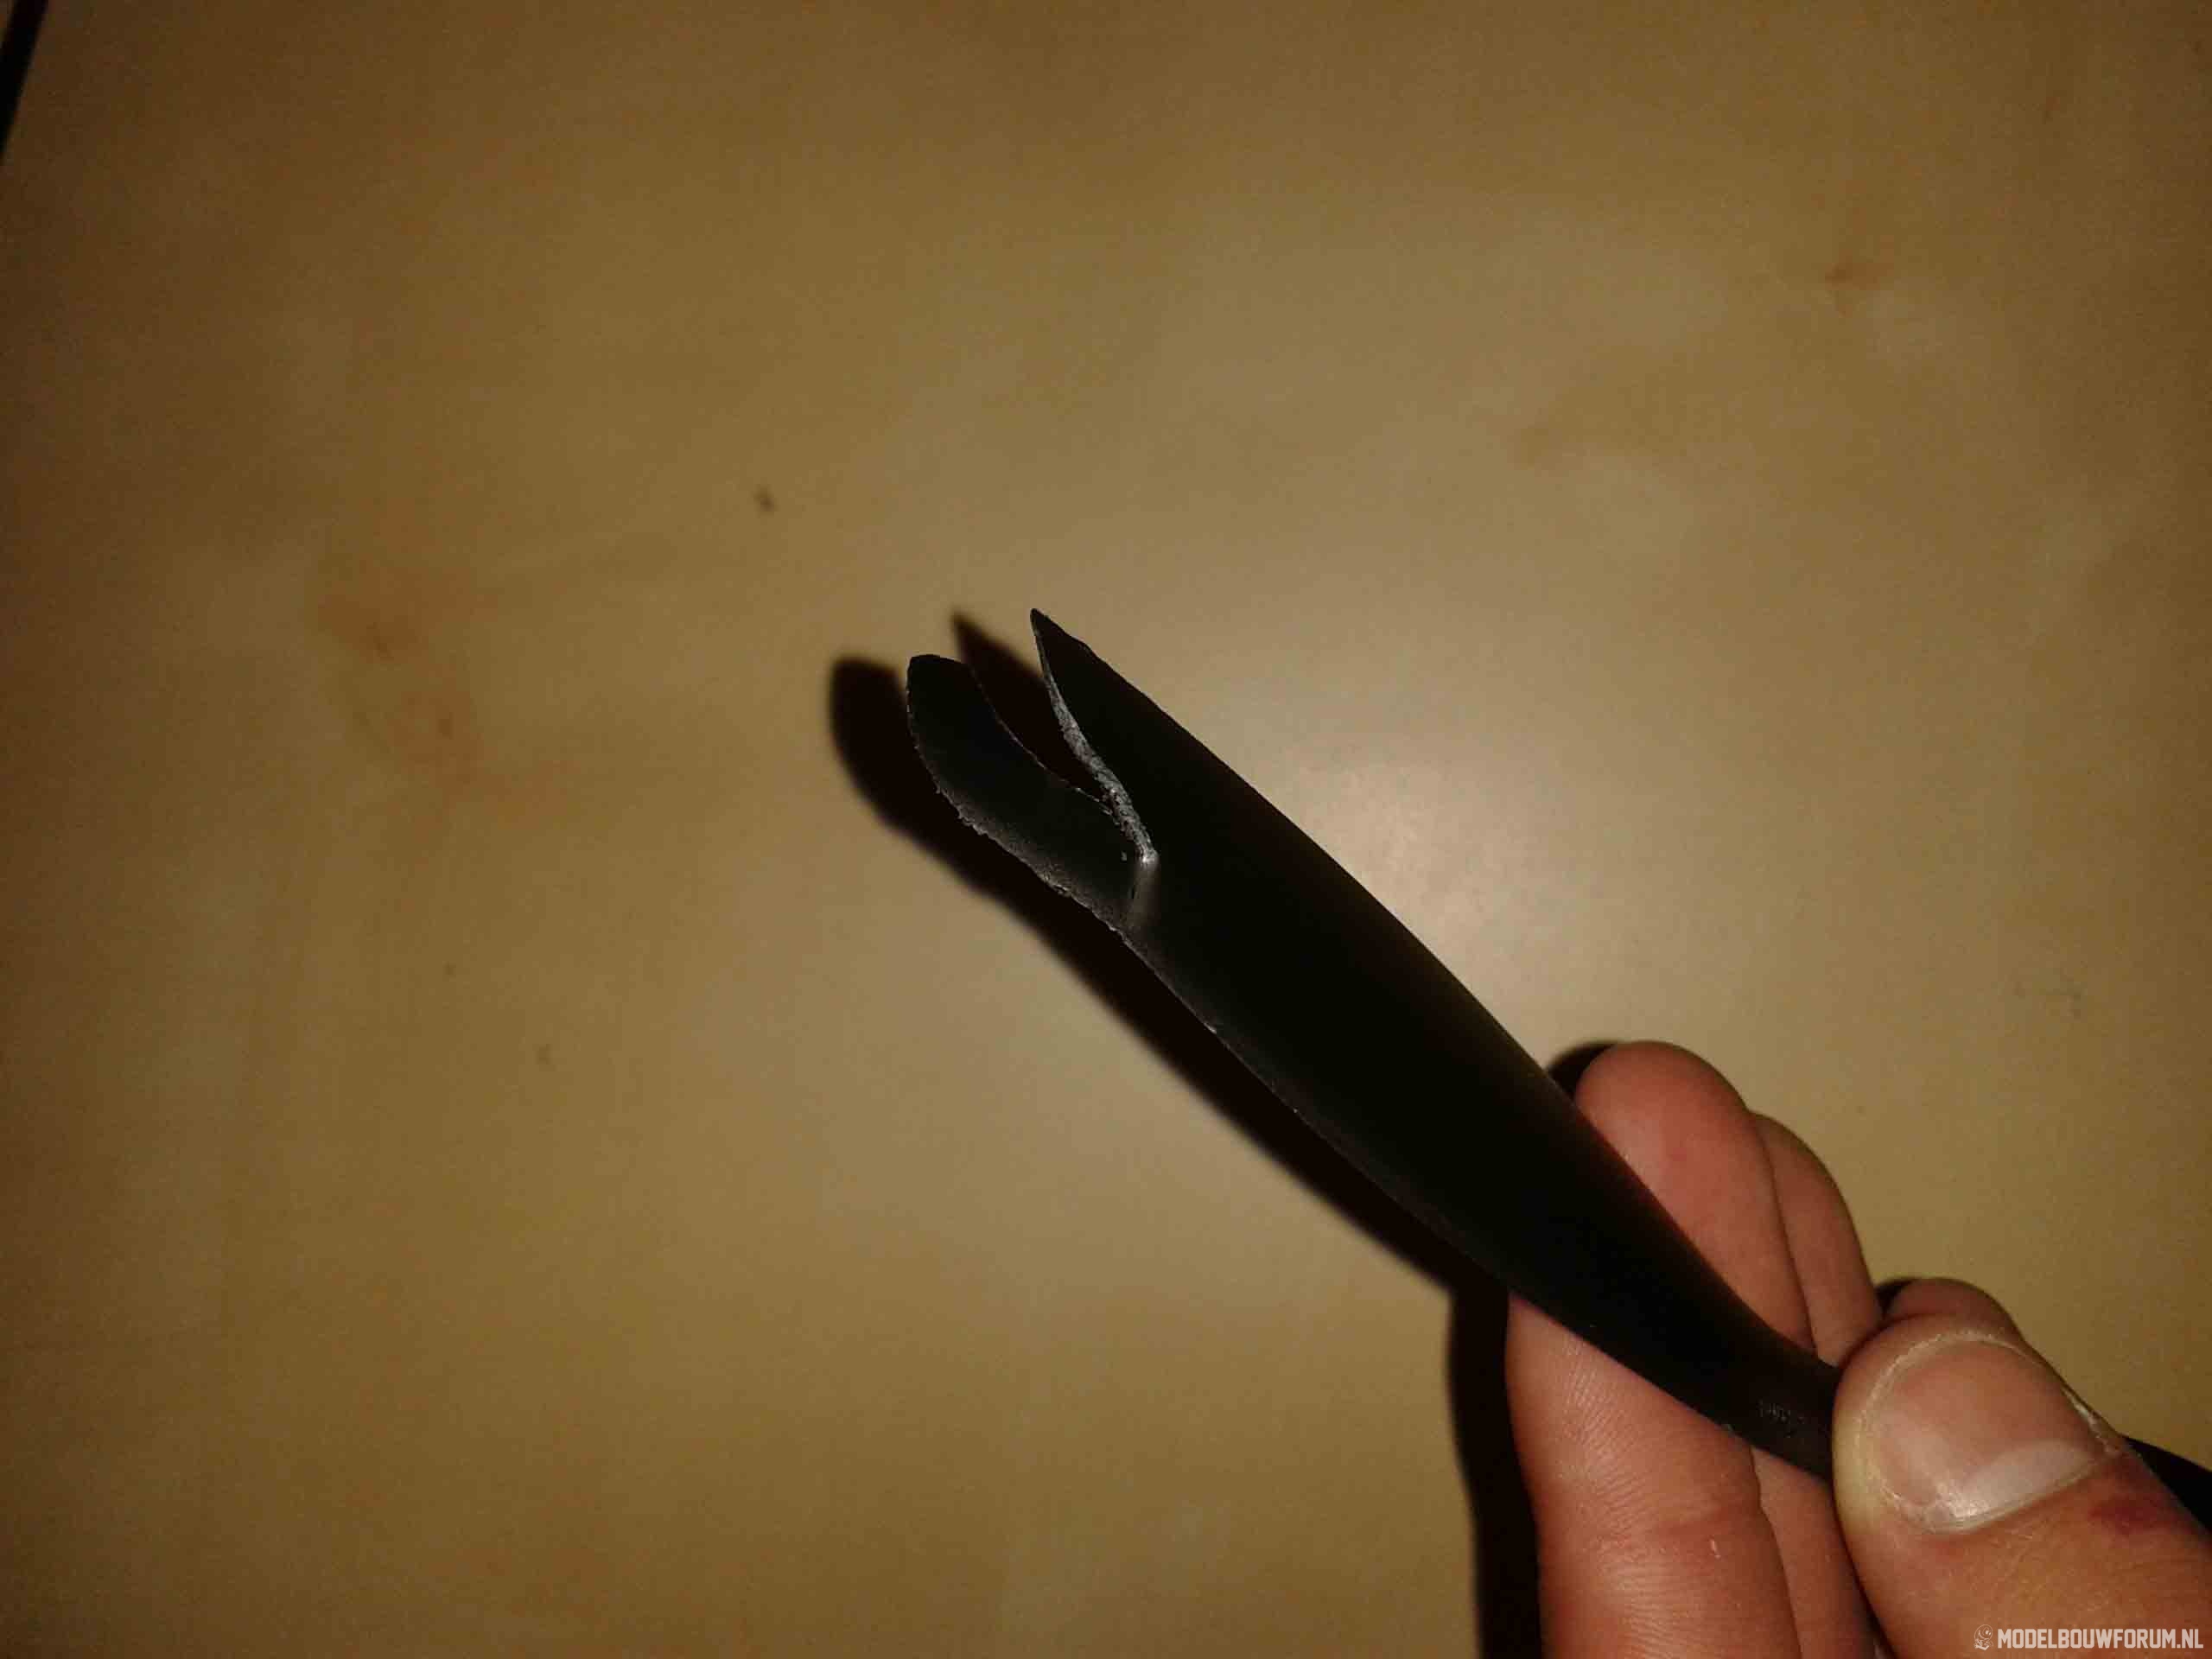
maar de prop maakt me niet zoveel uit ik heb er nog 30 liggen, maar wat doe ik mis of wat is er mis ?
mvg nander
de link roll/pitch staan nu aan.
vlucht gemaakt
[media=youtube]jZHvKERgW7E[/media]
[media=youtube]zWKLZ0ypDLY[/media]
eerste schade :
maar de prop maakt me niet zoveel uit ik heb er nog 30 liggen, maar wat doe ik mis of wat is er mis ?
mvg nander
Laatst bewerkt door een moderator: