Install the app
How to install the app on iOS
Follow along with the video below to see how to install our site as a web app on your home screen.
Nota: This feature may not be available in some browsers.
Je gebruikt een verouderde webbrowser. Het kan mogelijk deze of andere websites niet correct weergeven.
Het is raadzaam om je webbrowser te upgraden of een alternatieve webbrowser te gebruiken.
Het is raadzaam om je webbrowser te upgraden of een alternatieve webbrowser te gebruiken.
custom wild dagger
- Topicstarter robin_phaser4rs
- Startdatum
ik ook niet want ben meer bezig met mijn slash 4x4
heb wel lipo's gekocht welke mooi in mijn wild dagger passen!
heb wel lipo's gekocht welke mooi in mijn wild dagger passen!
hoi
zijn we nog een beetje bezig met de wild daggers, overlanders en alles wat daar op lijkt?
ik ff niet meer want ik moet nog wat dingen doen voor school
jah chek mij topic
hee
had een vraagje
loopt bij u oke steeds de diff vast.
dat heb ik heb er nu een 17 tunrns motor in.
met de standaard tamya motor .
en vind het vrij iri.
heb al nieuw tandwielen bestel voor in het diff.
maar gaat vooral om het driehoekje met 3 pentjes.
daar lopen de tandwielen op vast.
echt klote dus .
groeten wout
nee dat loopt bij mij niet vast. Het loopt vast omdat het driehoekje afbreekt. De pinnetjes komen los. Je zal dus het driehoekje moeten aanpassen. Ik heb die pinnetjes vervangen door gehard stalen pinnetjes welke ik heb gezaagd van een gehard stalen spijker.
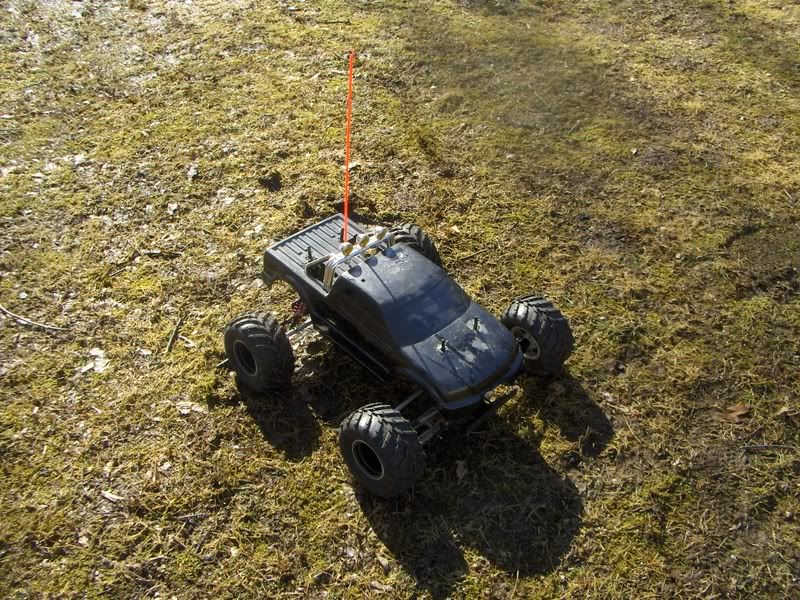
weer een kleine update:
De lrp motoren beviel me uiteindelijk helemaal niet zo goed. Ze trokken veel teveel stroom. Steile heuvels kwam de wagen met moeite omhoog. Ze waren gewoon wat te snel.
Ik heb nu weer nieuwe titan 550 21-turns motoren erin hangen. Dit gaat snel genoeg voor een monstertruck en ze hebben vooral ook erg veel kracht.
Deze keer heb ik ze netjes in laten lopen is gedemineraliseerd water zodat ze hopelijk lang meegaan.
Vanmiddag ga ik hem mooi weer eens uitlaten in de loonse en drunense duinen denk ik
Is er nog iemand meer bezig met zijn wild dagger?
zo'n tnx diff is wel erg duur en je hebt maar een paar delen nodig uit dat diff. Ik heb dat toen ook uitgezocht maar nee. Dat ging hem niet worden. Wat is er eigenlijk met die hpi draagarmen? wat doet dat?
de draag armen zijn dan langer maar je moet zelf upper arms maken maar met een langs stuk draad end en van die kopjes lukt da wel hier de parts list en een tutje
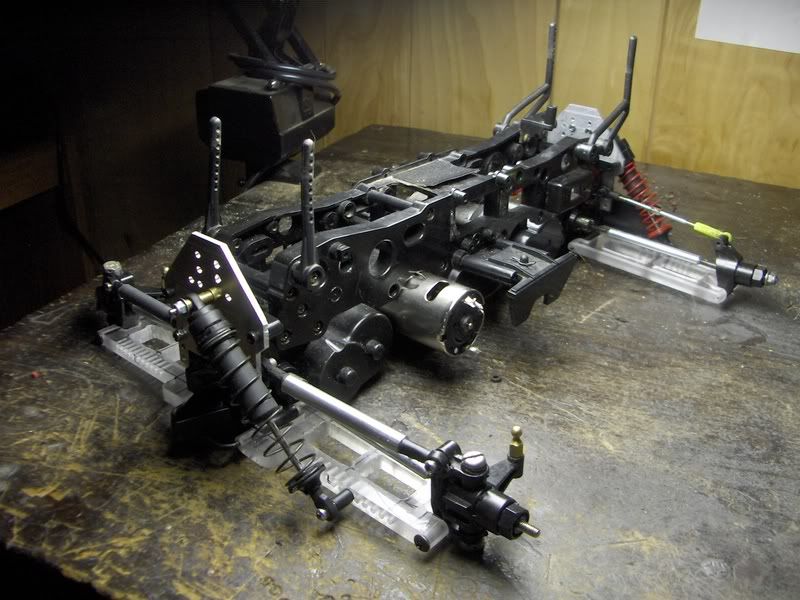
found my next mod i will be doing, it a conversion to the HPI RS4 MT suspension, it widens the truck. i copied the parts list for a wild dagger, so you dont need the front drive shaft parts. i also just ordered an associated 17t motor for some extra speed
Parts Required
• HPI Black Flange Pipe (2 packs). TowerHobbies.com | HPI Black Flange Pipe 3x4.5x5.5" (4)
• HPI Cap Head Screw (2 packs). TowerHobbies.com | HPI Cap Head Screw M3x10 (6)
• HPI Dogbones (2 packs of 2 required). TowerHobbies.com | HPI Dogbones RS4 MT (2)
• HPI Front Axle TowerHobbies.com | HPI Front Axle Silver RS4 MT
• HPI rear Axle TowerHobbies.com | HPI Rear Axle Silver RS4 MT
• HPI Suspension Arm Set (2 packs Required). TowerHobbies.com | HPI Suspension Arm Set RS4 MT
• HPI Upright Set. TowerHobbies.com | HPI Upright Set RS4
• Traxxas Rod Ends. TowerHobbies.com | Traxxas Rod Ends w/Hollow Balls Large Revo (12)
• HPI Rear Hub Set. TowerHobbies.com | HPI Rear Hub Set 2 Degree/1 Degree
• Bearings – 5 x 11 x 4, rubber shielded (you need six of these bearings in total)
• Bearings – 10 x 15 x 4, rubber shielded (you need two of these bearings in total)
• 3mm threaded rod
• 4mm threaded rod
• HPI Screw Shaft. TowerHobbies.com | HPI Screw Shaft 3x27mm (4)
• HPI Ball Black. TowerHobbies.com | HPI 4-40 Ball Black (4)
• HPI Flat Head Screw. TowerHobbies.com | HPI Flat Head Screw 3x12 RS4 Pro (10)
• HPI O Ring. TowerHobbies.com | HPI Silicone O-Ring P-3 Red
• 3mm steel washers (you need 12 in total)
HPI Link:
Front: http://www.hpiracing.com/graphics/instr/nmt/n_mt-10v2.jpg
Rear: http://www.hpiracing.com/graphics/instr/nmt/n_mt-11v2.jpg
Instructions
1. Remove all stock suspension arms and u joints from the stock gearboxes.
2. Use the stock 3mm U joints to connect the HPI RS4 suspension arm to the mount on the gearbox. You will need 3 x 3mm washers on either side as spacers as the HPI arms are a little short.
3. Assemble the uprights, and wheel supports per the link above for the front and rear.
4. You will need to make some upper arm supports using the 4mm threaded rod, and the Traxxas rod ends.
5. When connecting the upper arm support to the gearbox mount, use the HPI flanges – these flanges pack out the space and make the screws fit
6. Make some steering links using the 3mm threaded rod. I used the stock ends for the steering rod where you connect it onto the servo saver and brass ball end on the steering hub.
7. For the mounting of the shocks, you will need to be creative as you will find you cant use the stock mounts, depending on what shocks you use, in conjunction with what shock towers. I use the GPM towers on mine with EMaxx shocks. I was able to drill some mounting points into the suspension arms and get them mounted ok. The plastic seems strong enough to take the load, but time will tell….
8. Use the 3mm o rings to pack the drive cups. On mine, because I have a “Henry super diff”, the drive cups are slightly smaller than stock. I had to dremel the ends of the dogbones to make them fit.
Overall, the assembly is very easy. Use the links above from the HPI website to aid on the assembly. The only difference between this and the Dagger build is:
• Using the 3mm washers where the arms join the gearbox
• The upper suspension arms that you need to make
• The mounting of the shocks, which you may need to be creative on
• You may have a preference on how to link the steering arms to the steering hubs. I used the stock “tall type” brass balls.
• Mount the arms to the gearboxes using the stock “u” type connectors
word echt one of a kind car
ik heb nog erges de web site vaar er ook plaatjes bij staan en van de tut zelf
http://www.rcuniverse.com/forum/m_6642870/anchors_6642870/mpage_1/key_/anchor/tm.htm#6642870

heel vett hij heeft ze zelf gemaakt maar ik ben er van tussen
found my next mod i will be doing, it a conversion to the HPI RS4 MT suspension, it widens the truck. i copied the parts list for a wild dagger, so you dont need the front drive shaft parts. i also just ordered an associated 17t motor for some extra speed
Parts Required
• HPI Black Flange Pipe (2 packs). TowerHobbies.com | HPI Black Flange Pipe 3x4.5x5.5" (4)
• HPI Cap Head Screw (2 packs). TowerHobbies.com | HPI Cap Head Screw M3x10 (6)
• HPI Dogbones (2 packs of 2 required). TowerHobbies.com | HPI Dogbones RS4 MT (2)
• HPI Front Axle TowerHobbies.com | HPI Front Axle Silver RS4 MT
• HPI rear Axle TowerHobbies.com | HPI Rear Axle Silver RS4 MT
• HPI Suspension Arm Set (2 packs Required). TowerHobbies.com | HPI Suspension Arm Set RS4 MT
• HPI Upright Set. TowerHobbies.com | HPI Upright Set RS4
• Traxxas Rod Ends. TowerHobbies.com | Traxxas Rod Ends w/Hollow Balls Large Revo (12)
• HPI Rear Hub Set. TowerHobbies.com | HPI Rear Hub Set 2 Degree/1 Degree
• Bearings – 5 x 11 x 4, rubber shielded (you need six of these bearings in total)
• Bearings – 10 x 15 x 4, rubber shielded (you need two of these bearings in total)
• 3mm threaded rod
• 4mm threaded rod
• HPI Screw Shaft. TowerHobbies.com | HPI Screw Shaft 3x27mm (4)
• HPI Ball Black. TowerHobbies.com | HPI 4-40 Ball Black (4)
• HPI Flat Head Screw. TowerHobbies.com | HPI Flat Head Screw 3x12 RS4 Pro (10)
• HPI O Ring. TowerHobbies.com | HPI Silicone O-Ring P-3 Red
• 3mm steel washers (you need 12 in total)
HPI Link:
Front: http://www.hpiracing.com/graphics/instr/nmt/n_mt-10v2.jpg
Rear: http://www.hpiracing.com/graphics/instr/nmt/n_mt-11v2.jpg
Instructions
1. Remove all stock suspension arms and u joints from the stock gearboxes.
2. Use the stock 3mm U joints to connect the HPI RS4 suspension arm to the mount on the gearbox. You will need 3 x 3mm washers on either side as spacers as the HPI arms are a little short.
3. Assemble the uprights, and wheel supports per the link above for the front and rear.
4. You will need to make some upper arm supports using the 4mm threaded rod, and the Traxxas rod ends.
5. When connecting the upper arm support to the gearbox mount, use the HPI flanges – these flanges pack out the space and make the screws fit
6. Make some steering links using the 3mm threaded rod. I used the stock ends for the steering rod where you connect it onto the servo saver and brass ball end on the steering hub.
7. For the mounting of the shocks, you will need to be creative as you will find you cant use the stock mounts, depending on what shocks you use, in conjunction with what shock towers. I use the GPM towers on mine with EMaxx shocks. I was able to drill some mounting points into the suspension arms and get them mounted ok. The plastic seems strong enough to take the load, but time will tell….
8. Use the 3mm o rings to pack the drive cups. On mine, because I have a “Henry super diff”, the drive cups are slightly smaller than stock. I had to dremel the ends of the dogbones to make them fit.
Overall, the assembly is very easy. Use the links above from the HPI website to aid on the assembly. The only difference between this and the Dagger build is:
• Using the 3mm washers where the arms join the gearbox
• The upper suspension arms that you need to make
• The mounting of the shocks, which you may need to be creative on
• You may have a preference on how to link the steering arms to the steering hubs. I used the stock “tall type” brass balls.
• Mount the arms to the gearboxes using the stock “u” type connectors
word echt one of a kind car
ik heb nog erges de web site vaar er ook plaatjes bij staan en van de tut zelf
http://www.rcuniverse.com/forum/m_6642870/anchors_6642870/mpage_1/key_/anchor/tm.htm#6642870
heel vett hij heeft ze zelf gemaakt maar ik ben er van tussen
Laatst bewerkt:
oh is wel gaaf ja. Maar die assen houden het nooit...ik heb gisteren weer een gehard stalen cvd as gebroken. Eigenlijk zou je assen van een 1:8 buggy pas moeten kunnen maken. daar heb ik ook al aan zitten denken maar dan moet je ook andere drivecups enzo. En dat wordt lastig in combinatie met de originele differentielen. Dan zou je ook een 1:8 diff pas moeten maken in het originele wild dagger diff huis....mja daar begin ik voorlopig nog niet aan.

zowel de assen als de cups houden het niet. weet ik zeker
ik zeg...waarom niet?! lekker doen!
ik persoonlijk had een monstertruckje op conrad gekocht en daar heb ik 50-60% van gebruikt waarvan onder andere 10 cm lange shocks.
Binnenkort ga ik van start met een ander project.
Ik ga de wielblokken van mijn slash 4x4 pas maken op mijn wild dagger zodat de assen van de slash gaan passen op de wild dagger. Daarna wil ik een differentieel intern ombouwen zodat het binnenhuis van een revo diff erin past zodat de assen aangesloten kunnen worden. Misschien neem ik dan ook draagarmen van een slash 4x4, maar dat weet ik nog niet.
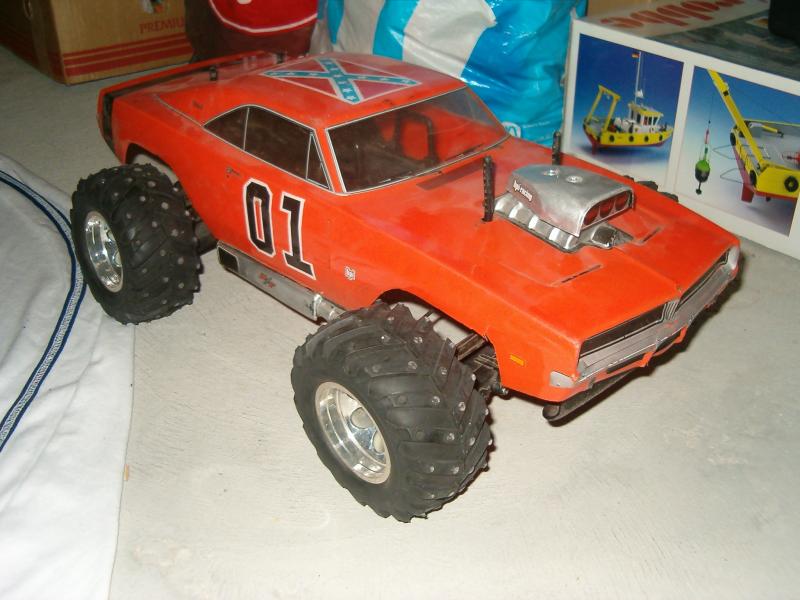
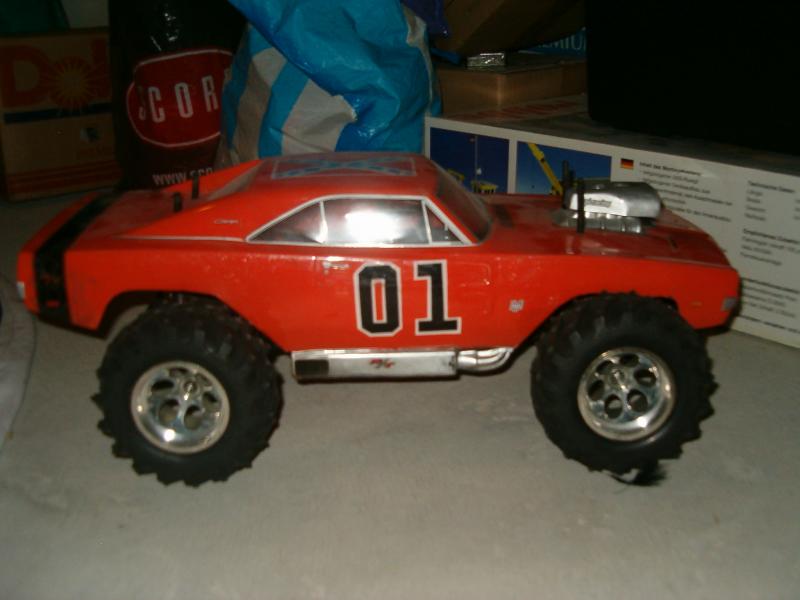
tamiya mighty bull ombouwen
ik heb een paar vraagjes over de mighty bull
van tamiya dit is het zelfde onderstel als de
wild dagger overlander etc. kan op dit onderstel een brushless motor
worden ingebouwd, kan het diff dit aan.
en ik zoek nog een tandwiel die op de motor moet worden gemonteerd die ben ik namelijk kwijt weet iemand op welke site ik die kan bestellen op conrad bv ?? ik hoor het wel. hier een paar foto's van mijn auto
Laatst bewerkt door een moderator: